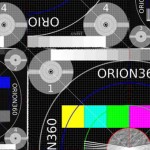

Anaglyph images are 3D images that can be viewed with specific colored glasses. Most of the time cyan and red color filters are used to display slightly different perspectives for each eye.
Separation of perspectives
To use this images for VR devices two images – one for each eye – are needed. In order to get these two perspectives from one image you need to spit it into its three color channels. For most anaglyph images the green and blue color channels look exactly the same and represent the right eye view of the scene. The red color channel encodes the left eye view.

Getting an grayscale image from its red color channel is quite easy: Just use the first value of the (r, g, b) or (r, g, b, a) tuple instead of the green and blue values. This way every pixel transforms from (r, g, b, a) to (r, r, r, a) for the left eye view and (g, g, g, a) or (b, b, b, a) for the right eye view.
ColorMatrix
For an Android app for Google Cardboard my first approach was to display two ImageViews side by side. This way I could make use of the ColorMatrixColorFilter class, isolating the color channels:
// displays green color channel as greyscale image
private ColorFilter rightFilter = new ColorMatrixColorFilter(
  new float [] {
    0f, 1f, 0f, 0f, 0f,
    0f, 1f, 0f, 0f, 0f,
    0f, 1f, 0f, 0f, 0f,
    0f, 0f, 0f, 1f, 0f
  }
);

// displays red color channel as greyscale image
private ColorFilter leftFilter = new ColorMatrixColorFilter(
  new float [] {
    1f, 0f, 0f, 0f, 0f,
    1f, 0f, 0f, 0f, 0f,
    1f, 0f, 0f, 0f, 0f,
    0f, 0f, 0f, 1f, 0f
  }
);

...

rightImageView.setColorFilter(rightFilter);
leftImageView.setColorFilter(leftFilter);
Martin Christov wrote an excellent tutorial on how to use the ColorMatrixFilter in ActionScript which can easily be ported to Android.
However, displaying two images side by side is not an ideal solution for VR devices like Google Cardboard or GearVR. To correct for lens distortion a dedicated SDK is a wise choice. I used the official Cardboard SDK for Android which left me with writing OpenGL code for pixel manipulation.
OpenGL Fragment Shader
I am by no means an OpenGL expert, so porting my approach was way harder than I expected. I finally managed to write a fragment shader showing the right behaviour:
/*
 * Basic texture fragment shader without lighting.
 * It is able to convert any color channel to a grayscale
 * texture. Pass 0 for red, 1 for green, 2 for blue,
 * 3 for alpha into "u_channel".
 */

uniform int u_channel;              // color channel to display
precision mediump float;
uniform sampler2D u_Texture;        // The input texture.
varying vec2 v_TexCoordinate;       // Interpolated texture coordinate per fragment.

void main() {
  vec4 color = texture2D(u_Texture, v_TexCoordinate).rgba;
  if (u_channel == 0) {
    gl_FragColor = color.rrra;
  } else if (u_channel == 1) {
    gl_FragColor = color.ggga;
  } else if (u_channel == 2) {
    gl_FragColor = color.bbba;
  } else if (u_channel == 3) {
    gl_FragColor = color.aaaa;
  } else {
    gl_FragColor = color.rgba;
  }
}
I don’t know if this is the most efficient approach but works fine for this use case. Of course you have to pass the desired channel to the shader like you would with other variables:
int myColorChannel = 0; // red
int channelHandle = program.getUniformLocation("u_channel");
GLES20.glUniform1i(channelHandle, myColorChannel);
Full source code
The full source code of the resulting app can be found at GitHub and is available under the APL 2.0. Please feel free to contribute!